This scan bears witness to the original artifact -- a letterpress certificate of heavy card stock, my name artfully recorded in calligraphy. A great bit of icing on the cake.
Showing posts with label bookbinding. Show all posts
Monday, August 3, 2015
Certified in Core Bookbinding!
My certificate of achievement for completing the Bookbinding Core Certificate Program at the San Francisco Center for the Book. I took workshops on Coptic Bookbinding (April 4, 2015), Flat-Back Case Binding (April 11, 2015), Limp Paper Binding (April 18, 2015), and Classic Rounded Back Cloth Binding (April 25 and 26, 2015).
Friday, July 31, 2015
Classic Rounded Back Cloth Binding
![]() |
| Front cover of my classic rounded back cloth binding |
![]() |
| Back cover of my classic rounded back cloth binding. I think picking the cloth and the paper was one of the most pleasureful parts of taking workshops at the San Francisco Center for the Book. |
The final workshop of the San Francisco Center for the Book's Bookbinding Core Certificate Program on April 25 and 26, 2015 brought all we had learned in the previous 3 weeks together in one skilled package. We learned some new things that built upon our existing knowledge and further refined skills we had already learned. Ultimately we created a beautiful cloth covered rounded back hard case book.
This workshop began with creating our signatures, as all the workshops did, but this time we folded larger sheets of paper into quartos, including two greenish colored end sheets, all of whose folded edges we cut in the guillotine after sewing the textblock.
Headbands were one of the main things we perfected this week. We started out on headbands last week with limp paper binding, we practiced more on old paperbacks this week on Saturday afternoon, and finally we used silk thread to sew endbands on our rounded back hard case book first thing Sunday morning. I loved sewing the headband, learning to make the beads, how to tighten each stitch, and appreciated the beauty and durability that emerges as a braid comes into physicality. Since I used two different colors of thread for this headband -- the white thread ended up being the "dominant" thread -- it was much easier to complete the sewing steps this week than last week.
![]() |
| The best of my two end bands. Always can pack more and bead tighter... |
The spine got a lot of attention this week. Expectedly, all our rounding steps were an aspect to be learned in conjunction with learning about the swell, but we also did a lot of finishing to the spine in preparation for the cloth binding, effectively preventing it from exhibiting raised bands. For rounding the spine, the trick is to push and guide the rounding with a hammer, not pound it, and never hit it straight on. For preparing the spine to be covered, we adhered several layers of different weight papers in between the cords and on top of the cords using wheat paste and/or PVA, sanded it down, and finally constructed a tube to adhere to the spine to achieve the hollow back state, providing movement and space from the cloth cover of the spine. The result was a book with a smooth spine, allowing the book to open and close with increased mobility and resilience.
Of most important note is the way in which the boards are attached. Unlike the flat back hard case binding that is cased in, the ends of the cords around which the textblock is sewn are laced into two separate boards that compose the front and back of the book, utilizing the lacing-in technique. The case is not a pre-existing shell that is attached to the textblock more or less by the endsheets alone like most contemporary library bindings. Binding a book by lacing the cords through the boards gave me a deeper sense of what makes a book durable, what gives it strength, and on the other hand, how it is used that can most commonly cause deterioration.
There are a lot of things I like about this book, but one of my favorites -- and the virtue of the form -- is the way in which the case fits around the textblock's joints or "grooves." We devoted much attention to the creation of the joints while the textblock was in the lying press, getting its rounding, and it was worth it once I laced in the cords and slid either board up to the joint. Could the joint be the sexiest part of a book? Maybe the most private one...
![]() |
| Detail of cloth and paper for covers. |
![]() |
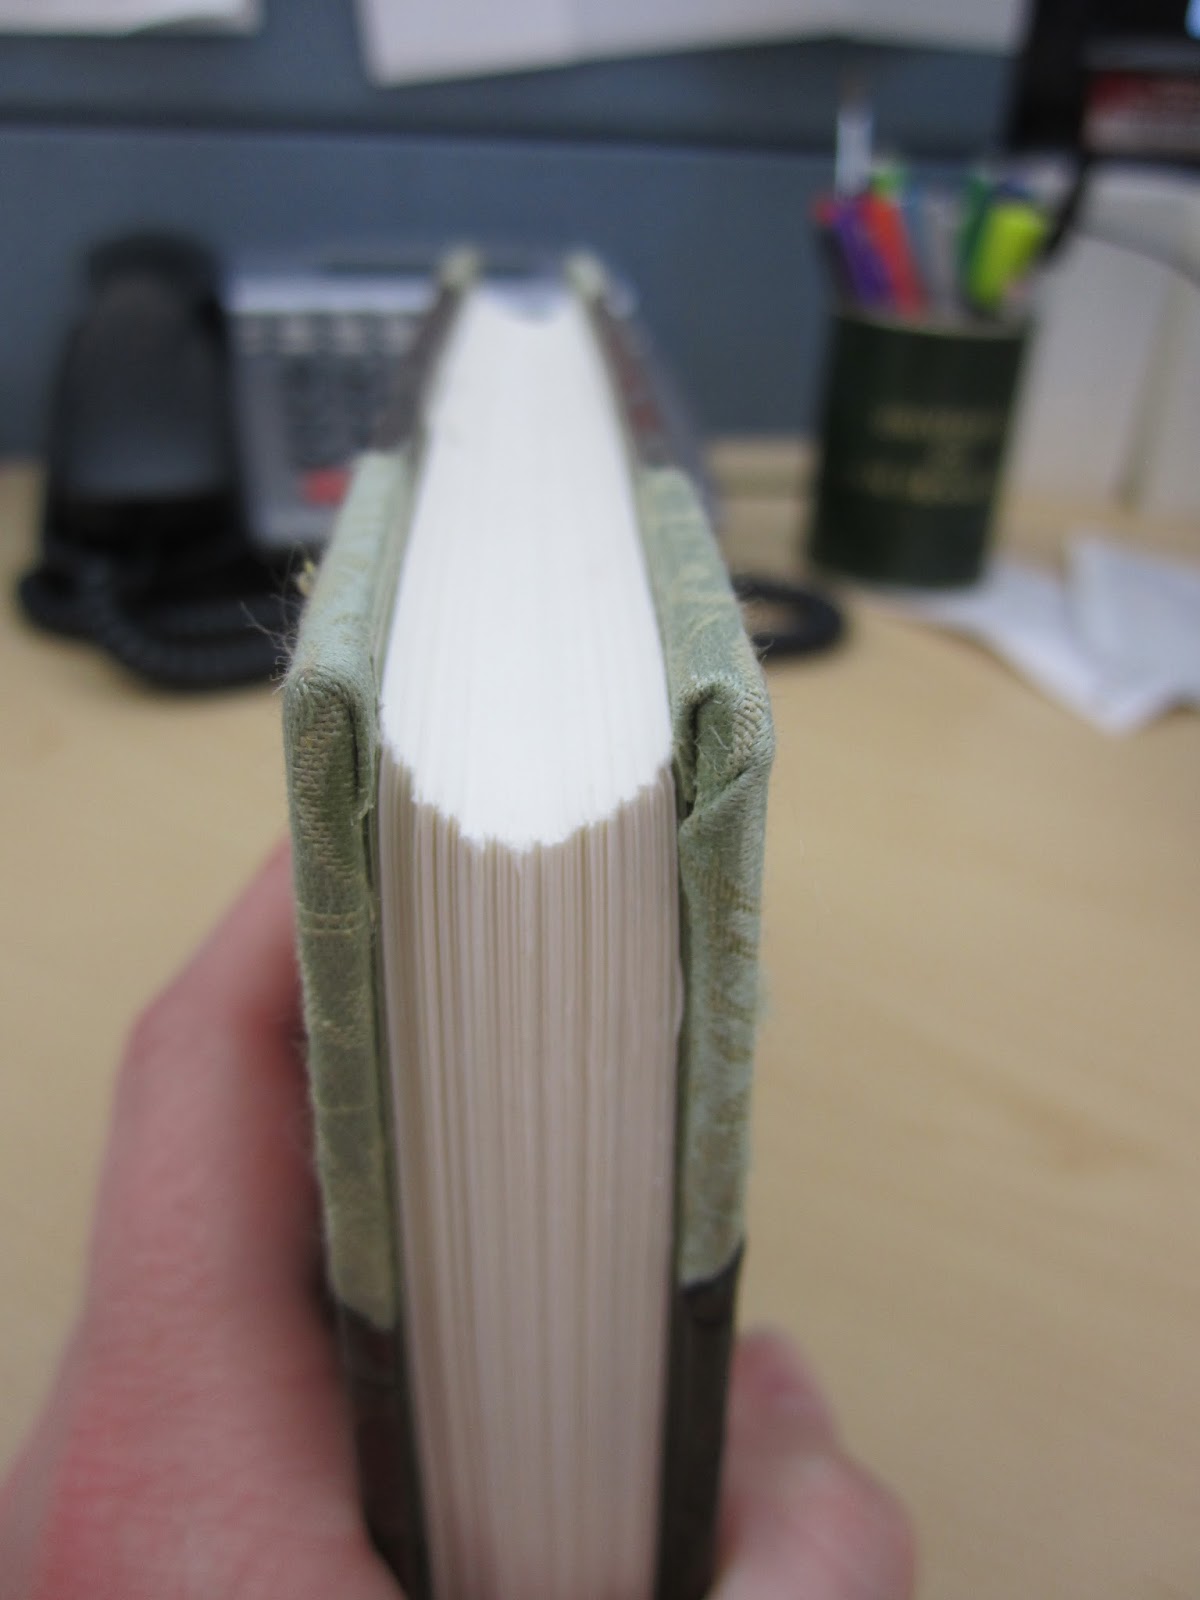
| The back is rounded on the spine which leads to this concave form of the fore-edge of the textblock. |
I don't see this workshop as teaching one particular form or style of binding, so to focus on the historical aspects of what we learned necessitates breaking it down to two categories: rounding and backing and lacing in the book boards.
Rounding as a physical characteristic began as a shape that occurred naturally due to the swell from the sewing threads and the pressure from the boards being laced in tightly; at some point since the year 1500, it became a technique assumed purposefully as craft (Middleton, 1963, p. 59). Rounding extends the life and durability of the book by taking pressure off the hinges (pressure that could result in a flat spine falling, which gives the fore edge a convex form), accommodating the swell of the sewing threads, and creating a shoulder or joint into which the bookboard fits perfectly (Roberts and Etherington, 1982, p. 222). As Middleton says, "fortuitous jointing" perhaps occurred before rounding was assumed as craft technique -- fortuitous because of the boon to longevity and heartiness it provides (1963, pp. 59). While the vogues of rounding styles came and went with the centuries and decades and may have been at odds with the ideal form of 1/6 of a circle, a book's inherent thickness may determine its rounding more than the binder's hand: "thick books of many signatures with extensive guarding will tend to round themselves more than is desirable with no help; and thin books of few signatures often do not have sufficient swell to permit any rounding" (Young, 1995, p. 99-100). Ultimately, form and function work hand in hand with the rounding of a spine.
![]() |
| Vogues of rounded backs (Middleton, 1963, p. 60). |
![]() |
| Vogues of rounded backs (Middleton, 1963, p. 61). |
The practice of lacing-in, in general, is one that has been around nearly as long as the practice of codex bookbinding, and for good reason, as it provides strength that adhesives alone cannot deliver. Roberts and Etherington trace the lacing-in technique from Coptic style bindings of the 7th or 8th century, through the vogues of how the holes were drilled through the wood and later paper boards throughout the centuries, to its decline in the 19th century in favor of split boards and the French joint (1982, pp. 148-149). Middleton goes on to discuss the method of carving a groove in the boards to allow for the cords to pass through, which began to be practiced at the end of the 18th century: "this is a very useful device because the weakening effect on the board is negligible, but it allows thick cords to be laced in without unsightliness" (1963, p. 74). This is what I learned in the workshop, and it provides an aesthetic effect needed for the fine bindings it is often associated with, in addition to maintaining the integrity of form for which it is used.
Works Cited
Middleton, B. C. (1963). A history of english craft bookbinding technique. New York, NY: Hafner.
Roberts, M., & Etherington, D. (1982). Bookbinding and the conservation of books : a dictionary of descriptive terminology. Washington, D.C.: Library of Congress.
Young, L. (1995). Bookbinding & conservation by hand: a working guide. New Castle, Delaware: Oak Knoll Press.
Friday, July 24, 2015
Limp Paper Binding
The third type of bookbinding I learned at the San Francisco Center for the Book's Bookbinding Core Certificate Program was limp paper binding. This was the most difficult to learn because it used unfamiliar methods, and we had a bit of a hole punch shortage. Our big breakthroughs this week were learning how to sew endbands and how to use a sewing frame.
Like in the previous two weeks, we prepared the text block by folding the signatures (4 pages folded in half to make 8 page signatures) and using the awl to punch the sewing stations. We also prepared endsheets of a light blue color by gluing the edge of a thicker fabric-like paper to the outside bend of the folded endsheet. We sewed the textblock together using the sewing frame, so before we could begin sewing, we had to set up the sewing frame with the pig-skin thongs to sew around on the spine. This was easier that setting up other sewing cords because the pig skin thongs were fairly rigid so we did not have to use the keys. I like positioning my body around the sewing frame and using both hands strategically as if I were embracing my sewing tools in a close hug. It made the binding process feel more intimate.
Next, we used another two thinner, longer pig skin thongs to sew the endbands around, and their length was to be used to lace the text block into the cover once it was ready. Sewing the headband and tailband was tricky and I can't say I am particularly proud of the end result. It was hard to determine when to dive down into the gutter of the signatures (how many beads to put in between each diving down, how to space out the diving down so it is aesthetically pleasing and sturdy at the same time). As with most endbands, the first one ends up being your tailband and the second one your headband because the second one is always better :) They are hearty enough to hold the binding together well anyway.
At this point I had a nice text block with two pig skin thongs flapping out of the middle of its spine and 1 each at its head and tail. It was waiting for its cover, but its cover wasn't a case that would be glued on to the endsheets. Its pig skin thongs were going to be tightly threaded through its cover.
Since vellum or parchment would have been prohibitively expensive for the workshop, we used handmade cave paper that was very sensually pleasing in its texture, weight, and sturdiness. I chose an apple red color while everyone else chose a shaded brown color (I figured the red went well with the blue endsheets and white thongs -- very patriotic).
The steps involved in making the cover included cutting it to size, folding flaps along the top and bottom edges to slip the endsheets into, cutting out room for the spine and endbands, cutting slits and tabs to connect the fore edge flaps to the tail and end flaps, and finally punching the appropriate holes through the appropriate sides (the flaps or the covers) for the thongs. I punched the wrong hole -- punched a hole clear through the cover where there shouldn't have been one! -- and really nearly gave up (I may have cried a little bit). Thankfully my awesome instructor, Rhiannon Alpers, pointed out that I could make it look like I did it on purpose and add another hole punch on the top and thread the thongs through once more. She taught me an important lesson about improvising in the face of a screw up and owning what design possibilities it may have precipitated.
Eventually I threaded the thongs through my folded up cave paper cover and it was like a rich man's textbook cover. Way better than any book covers I could have made from paper grocery bags in 8th grade, although I made some cool ones of those in my day.
Jane Greenfield, writing in ABC of bookbinding, defines limp binding as, "A binding with flexible sides of paper, parchment or fabric without boards. Also called flexible binding" (1998, p. 42) while Pamela Barrios points out one common aspect of the form: the rise of the small octavo book, like prayer books and textbooks that fit comfortably in the dexterity of your hands for long periods (2006, p. 24). Holding my little red limp paper binding felt good; not only was its size comfortable, but its agility and flexibility thanks to the lack of boards welcomed a close communion like a journal or an important notebook would.
My physical impressions of my modest binding are in step with the form's genesis, as Bernard C. Middleton, writing in A History of English craft bookbinding technique, pinpoints the first use and date of the form: "The earliest limp vellum bindings are found on account books and the like, at least as early as the fourteenth century, and in all probability were in use considerably earlier... most account books were quite thin, and could be carried around more easily with limp covers" (1963, p. 139-140). Middleton goes on to discuss the application of the form within the printed book, saying, "during the sixteenth and seventeenth centuries the limp-vellum style was used almost exclusively for the covering of books being sold retail, and as an alternative to leather bindings" (p. 141).
Like most of the evolution of prevalent styles of book bindings, the rise of limp binding is connected to the rise of printed material and the need to economize bindings. Nicholas Pickwoad says, "binders in the 16th century, faced by ever growing quantities of books from the printing presses, took this familiar structure and turned it into something much cheaper -- a possibility inherent in the limp binding structure, where there are many fewer steps required to complete the binding after sewing the textleaves than with books bound in boards" (1994, p. 72). Pickwoad also traces the form out of Italy, where it was popular by the beginning of the 16th century and from where "its use spread across Europe rapidly from that time" (p. 72).
By the 18th century the form had diminished in popularity, but John Carter, writing in ABC for book collectors, says, "limp vellum... was revived by private presses at the end of the 19th [century]" (1980, p. 134). Currently, the form is used by bookbinders, book artists, and conservators, and several recent articles describe the steps in depth. One is Jen Lindsay's "A limp vellum binding sewn on alum-tawed thongs," in where she says, "It is impossible to convey in words the essence of vellum as a material or the sensation of handling a well made limp vellum binding. It is a type of binding that reveals and tests, perhaps more than most, the innate sensibility of the binder and his inherent understanding, respect and affinity for natural materials" (1991, n. p.). So we have this comfortable little package that was both innovated as a way to increase economy and tests the skills of the book binder perhaps more than other forms. It's nearly a paradox: it takes serious skills to save money!
In addition to Lindsay's article, Pamela Barrios's guide to the form and its variations in the Spring, 2006 issue of The Bonefolder presents a useful discussion of construction styles, diagrams, pictures, and common deterioration of limp vellum binding.
Barrios, P. (2006). Notes on the limp vellum binding. The Bonefolder: an e-journal for the bookbinder and book artist, 2(2), 24-27.
Carter, J. (1980). ABC for book collectors. London, U.K.; New York, NY: Granada.
Greenfield, J. (1998). ABC of bookbinding: a unique glossary with over 700 illustrations for collectors & librarians. New Castle, Delaware: Oak Knoll Press; New York, NY: Lyons Press.
Lindsay, J. (1991). A limp vellum binding sewn on alum-tawed thongs. The New Bookbinder, 11.
Middleton, B. C. (1963). A history of english craft bookbinding technique. New York, NY: Hafner.
Pickwoad, N. (1994). Onward and downward: How binders coped with the printing press before 1800. In R. Myers & M. Harris (Eds.), A millennium of the book: Production, design, & illustration in manuscript & print, 900-1900. Winchester, U.K.: St. Paul's Bibliographies; New Castle, Delaware: Oak Knoll Press.
Like in the previous two weeks, we prepared the text block by folding the signatures (4 pages folded in half to make 8 page signatures) and using the awl to punch the sewing stations. We also prepared endsheets of a light blue color by gluing the edge of a thicker fabric-like paper to the outside bend of the folded endsheet. We sewed the textblock together using the sewing frame, so before we could begin sewing, we had to set up the sewing frame with the pig-skin thongs to sew around on the spine. This was easier that setting up other sewing cords because the pig skin thongs were fairly rigid so we did not have to use the keys. I like positioning my body around the sewing frame and using both hands strategically as if I were embracing my sewing tools in a close hug. It made the binding process feel more intimate.
Next, we used another two thinner, longer pig skin thongs to sew the endbands around, and their length was to be used to lace the text block into the cover once it was ready. Sewing the headband and tailband was tricky and I can't say I am particularly proud of the end result. It was hard to determine when to dive down into the gutter of the signatures (how many beads to put in between each diving down, how to space out the diving down so it is aesthetically pleasing and sturdy at the same time). As with most endbands, the first one ends up being your tailband and the second one your headband because the second one is always better :) They are hearty enough to hold the binding together well anyway.
At this point I had a nice text block with two pig skin thongs flapping out of the middle of its spine and 1 each at its head and tail. It was waiting for its cover, but its cover wasn't a case that would be glued on to the endsheets. Its pig skin thongs were going to be tightly threaded through its cover.
Since vellum or parchment would have been prohibitively expensive for the workshop, we used handmade cave paper that was very sensually pleasing in its texture, weight, and sturdiness. I chose an apple red color while everyone else chose a shaded brown color (I figured the red went well with the blue endsheets and white thongs -- very patriotic).
The steps involved in making the cover included cutting it to size, folding flaps along the top and bottom edges to slip the endsheets into, cutting out room for the spine and endbands, cutting slits and tabs to connect the fore edge flaps to the tail and end flaps, and finally punching the appropriate holes through the appropriate sides (the flaps or the covers) for the thongs. I punched the wrong hole -- punched a hole clear through the cover where there shouldn't have been one! -- and really nearly gave up (I may have cried a little bit). Thankfully my awesome instructor, Rhiannon Alpers, pointed out that I could make it look like I did it on purpose and add another hole punch on the top and thread the thongs through once more. She taught me an important lesson about improvising in the face of a screw up and owning what design possibilities it may have precipitated.
Eventually I threaded the thongs through my folded up cave paper cover and it was like a rich man's textbook cover. Way better than any book covers I could have made from paper grocery bags in 8th grade, although I made some cool ones of those in my day.
![]() |
| Front cover of my limp paper binding |
![]() |
| Detail of the headband -- notice the extra weave of the thong -- that's my mistake there. |
![]() |
| Inside cover, in where I did an accurate and good job of punching and threading |
![]() |
| Detail of the gutter between the text block and the endsheet |
![]() |
| More detail of my mistake, as well as where my errant punch made its way through some of the endsheet and textblock. The headband looks good though! |
![]() |
| The back cover of the book, where the extra weavings of the thongs are apparent. |
My physical impressions of my modest binding are in step with the form's genesis, as Bernard C. Middleton, writing in A History of English craft bookbinding technique, pinpoints the first use and date of the form: "The earliest limp vellum bindings are found on account books and the like, at least as early as the fourteenth century, and in all probability were in use considerably earlier... most account books were quite thin, and could be carried around more easily with limp covers" (1963, p. 139-140). Middleton goes on to discuss the application of the form within the printed book, saying, "during the sixteenth and seventeenth centuries the limp-vellum style was used almost exclusively for the covering of books being sold retail, and as an alternative to leather bindings" (p. 141).
Like most of the evolution of prevalent styles of book bindings, the rise of limp binding is connected to the rise of printed material and the need to economize bindings. Nicholas Pickwoad says, "binders in the 16th century, faced by ever growing quantities of books from the printing presses, took this familiar structure and turned it into something much cheaper -- a possibility inherent in the limp binding structure, where there are many fewer steps required to complete the binding after sewing the textleaves than with books bound in boards" (1994, p. 72). Pickwoad also traces the form out of Italy, where it was popular by the beginning of the 16th century and from where "its use spread across Europe rapidly from that time" (p. 72).
By the 18th century the form had diminished in popularity, but John Carter, writing in ABC for book collectors, says, "limp vellum... was revived by private presses at the end of the 19th [century]" (1980, p. 134). Currently, the form is used by bookbinders, book artists, and conservators, and several recent articles describe the steps in depth. One is Jen Lindsay's "A limp vellum binding sewn on alum-tawed thongs," in where she says, "It is impossible to convey in words the essence of vellum as a material or the sensation of handling a well made limp vellum binding. It is a type of binding that reveals and tests, perhaps more than most, the innate sensibility of the binder and his inherent understanding, respect and affinity for natural materials" (1991, n. p.). So we have this comfortable little package that was both innovated as a way to increase economy and tests the skills of the book binder perhaps more than other forms. It's nearly a paradox: it takes serious skills to save money!
In addition to Lindsay's article, Pamela Barrios's guide to the form and its variations in the Spring, 2006 issue of The Bonefolder presents a useful discussion of construction styles, diagrams, pictures, and common deterioration of limp vellum binding.
Works Cited
Barrios, P. (2006). Notes on the limp vellum binding. The Bonefolder: an e-journal for the bookbinder and book artist, 2(2), 24-27.
Carter, J. (1980). ABC for book collectors. London, U.K.; New York, NY: Granada.
Greenfield, J. (1998). ABC of bookbinding: a unique glossary with over 700 illustrations for collectors & librarians. New Castle, Delaware: Oak Knoll Press; New York, NY: Lyons Press.
Lindsay, J. (1991). A limp vellum binding sewn on alum-tawed thongs. The New Bookbinder, 11.
Middleton, B. C. (1963). A history of english craft bookbinding technique. New York, NY: Hafner.
Pickwoad, N. (1994). Onward and downward: How binders coped with the printing press before 1800. In R. Myers & M. Harris (Eds.), A millennium of the book: Production, design, & illustration in manuscript & print, 900-1900. Winchester, U.K.: St. Paul's Bibliographies; New Castle, Delaware: Oak Knoll Press.
Tuesday, June 9, 2015
Flat-Back Case Binding
As I mentioned in my blog post about Coptic bookbinding, I took the Bookbinding Core Certificate Program at the San Francisco Center for the Book in April, 2015. Our second workshop was on Flat-back case binding, which incorporated some of the things we had learned in the Coptic binding workshop (composing and trimming signatures, adhering papers to the bookboards, preparing thread for sewing), and got us ready for the more advanced workshops to come. We discussed paper grain even more in depth this week, which was a reoccurring topic through all the workshops.
To put it simply, in this workshop we sewed a text block, constructed a case, then glued the two together. To put it more in depth, the sewing of the text block introduced the guillotine, and we learned the french stitch to sew the text block, as well as how to back the text block. We did not use special paper for the end sheets in this one, just the 70 lb. mohawk superfine vellum opaque paper that we used for all the text blocks. The case construction was challenging and fun because we learned how to calculate the dimensions and necessary overlap for the book boards, spine construction, and cloth and paper covering (in this case a 1/2 binding style, as the spine fabric carried a short distance onto the boards, and we used the spine fabric to make corners). We actually went to the length of drawing out a sort of "blue print" for the dimensions which was time consuming but very useful for future endeavors.
The workshop also presented the distinct pleasure of selecting our materials from a bright variety for the casing cover -- I chose a light brown japanese silk material with a slightly yellow metallic undertone for the spine and corners, and a marbled paper for the rest of the book boards. Additionally, we selected our endbands and glued them on -- we did not begin to learn about sewing headbands and tailbands until week 3. As it turns out, this was historically accurate, as I will discuss below, in addition to being a practical consideration.
Once the text block and case had been fully constructed, the last nerve-wracking step was gluing the text block into the case. Lots of my classmates were stressing about this. The trick is to slowly let down the cover after applying the adhesive to the end sheet -- too fast and it tends to wrinkle. I managed this step quite well, and I believe it is because of my experience repairing so many large reference books at my work -- one of the most common problems is the text block sagging out of the case of commercially bound books, and I had fixed quite a few of those back when I did the reference collection evaluation and mending project.
I ended up leaving my book in the nipping press for the week, and picked it up the following week when I came for the Limp Paper Binding workshop. It turned out beautifully! I am very pleased with the evenness it displays and am very fond of it.
In Bookbinding and the conservation of books, Roberts and Etherington define flat back case binding as, "A simple type of (library) binding which has a flat spine and is cased or has a one-piece covering. This type of binding is suitable for typescript, some pamphlets, and adhesive-bound paperbacks" (1982, p. 103). Bookbinding and the conservation of books also provides a definition for flat back binding, which differentiates it from a spine that has been rounded, and points out that this type of binding tends to become concave (Roberts and Etherington, 1982, p. 103). In thinking about these two definition when considering preservation, clearly a rounded spine is more sturdy, and will resist the damages of use much better. Furthermore, when considering the last workshop I did at the San Francisco Center for the Book in the Bookbinding Core Certificate Program, the round back hard case binding, a rounded and backed spine that utilizes the lacing-in technique (boards attached to the sewing cords) makes a much more durable book. Not only does the rounded spine hold up better against use, but the lacing-in technique fortifies the joints so they do not have to rely on the glued endsheets alone.
I think, though, that the definitions presented in Bookbinding and the conservation of books takes the term much more seriously, limiting black back case bindings to unsewn bindings (machine editions of case bindings are often not sewn), while the workshop functioned on a tiered basis and emphasized the techniques of hand bindings, introducing us to more detailed bindings as the weeks went by. Hence, in the flat back case binding workshop, we sewed, glued, and backed the textblock, but we didn't round it nor lace-in the boards.
In any case, an emphasis of this kind of binding is that "the book is prepared in one series of steps, and the case--or cover--is made separately" (Young, 1995, p. 6), which I discussed above. In Greenfield's ABC of bookbinding, "flat spine" bindings were "popular in the late 18th and early 19th centuries" (1998, p. 27), so the efficiency of not having to lace-in the boards or round the back was a testament to both innovation in time saving and cost savings, as is seen in many styles of bookbinding post the invention of the printing press and the spread of personal possession of bound books. Indeed, in his essay, "Onward and downward: How binders coped with the printing press before 1800," Nicholas Pickwoad says the earliest appearance of the case-bound book may be Erasmus's Adagiorum epitome, published in Amsterdam by Elzevier in 1650 -- during the wonderful Dutch golden age, of course (1994, p. 92). However, Pickwoad goes on to say that the case binding structure, which "allowed effective production line work for the first time, in that the covers of the books could be manufactured independently of and at the same time as the sewing of the textblocks, to be united, by adhesive only, at the final stage of the binding process," was very popular in Germany as early as 1725 and is the best example of the 19th Century industrialization of the binding trade (1994, p. 91). The flat-back case binding, by cutting out steps that became costly and burdensome with the rise in printed matter, was an important step in moving toward mechanization of library bindings, as well as a discovery of a reliable form of hand binding.
Greenfield, J. (1998). ABC of bookbinding: a unique glossary with over 700 illustrations for collectors & librarians. New Castle, Delaware: Oak Knoll Press; New York, NY: Lyons Press.
Pickwoad, N. (1994). Onward and downward: How binders coped with the printing press before 1800. In R. Myers & M. Harris (Eds.), A Millennium of the Book: Production, design, & illustration in manuscript & print, 900-1900. Winchester, U.K.: St. Paul's Bibliographies; New Castle, Delaware: Oak Knoll Press.
Roberts, M., & Etherington, D. (1982). Bookbinding and the conservation of books : a dictionary of descriptive terminology. Washington, D.C.: Library of Congress.
Young, L. (1995). Bookbinding & conservation by hand: a working guide. New Castle, Delaware: Oak Knoll Press.
To put it simply, in this workshop we sewed a text block, constructed a case, then glued the two together. To put it more in depth, the sewing of the text block introduced the guillotine, and we learned the french stitch to sew the text block, as well as how to back the text block. We did not use special paper for the end sheets in this one, just the 70 lb. mohawk superfine vellum opaque paper that we used for all the text blocks. The case construction was challenging and fun because we learned how to calculate the dimensions and necessary overlap for the book boards, spine construction, and cloth and paper covering (in this case a 1/2 binding style, as the spine fabric carried a short distance onto the boards, and we used the spine fabric to make corners). We actually went to the length of drawing out a sort of "blue print" for the dimensions which was time consuming but very useful for future endeavors.
The workshop also presented the distinct pleasure of selecting our materials from a bright variety for the casing cover -- I chose a light brown japanese silk material with a slightly yellow metallic undertone for the spine and corners, and a marbled paper for the rest of the book boards. Additionally, we selected our endbands and glued them on -- we did not begin to learn about sewing headbands and tailbands until week 3. As it turns out, this was historically accurate, as I will discuss below, in addition to being a practical consideration.
Once the text block and case had been fully constructed, the last nerve-wracking step was gluing the text block into the case. Lots of my classmates were stressing about this. The trick is to slowly let down the cover after applying the adhesive to the end sheet -- too fast and it tends to wrinkle. I managed this step quite well, and I believe it is because of my experience repairing so many large reference books at my work -- one of the most common problems is the text block sagging out of the case of commercially bound books, and I had fixed quite a few of those back when I did the reference collection evaluation and mending project.
I ended up leaving my book in the nipping press for the week, and picked it up the following week when I came for the Limp Paper Binding workshop. It turned out beautifully! I am very pleased with the evenness it displays and am very fond of it.
![]() |
| One side of my flat-back case binding |
![]() |
| Detail of the tail and tailband... this was a premade tailband |
![]() |
| Detail of the text block and corners. We used the guillotine to trim the fore-edge for a smooth appearance and feeling |
![]() |
| Glued-in endsheet... pretty dang smooth! |
![]() |
| Center of one signature. The visible thread is where the needle entered and exited the six sewing stations, while the two empty spots indicate the location of the two tapes I sewed around. |
![]() |
| The center of this signature shows that I should have pulled the thread more taut and boned down better! |
![]() |
| This is the other side of the binding... The paper and fabric is very handsome if I do say so myself :) |
I think, though, that the definitions presented in Bookbinding and the conservation of books takes the term much more seriously, limiting black back case bindings to unsewn bindings (machine editions of case bindings are often not sewn), while the workshop functioned on a tiered basis and emphasized the techniques of hand bindings, introducing us to more detailed bindings as the weeks went by. Hence, in the flat back case binding workshop, we sewed, glued, and backed the textblock, but we didn't round it nor lace-in the boards.
In any case, an emphasis of this kind of binding is that "the book is prepared in one series of steps, and the case--or cover--is made separately" (Young, 1995, p. 6), which I discussed above. In Greenfield's ABC of bookbinding, "flat spine" bindings were "popular in the late 18th and early 19th centuries" (1998, p. 27), so the efficiency of not having to lace-in the boards or round the back was a testament to both innovation in time saving and cost savings, as is seen in many styles of bookbinding post the invention of the printing press and the spread of personal possession of bound books. Indeed, in his essay, "Onward and downward: How binders coped with the printing press before 1800," Nicholas Pickwoad says the earliest appearance of the case-bound book may be Erasmus's Adagiorum epitome, published in Amsterdam by Elzevier in 1650 -- during the wonderful Dutch golden age, of course (1994, p. 92). However, Pickwoad goes on to say that the case binding structure, which "allowed effective production line work for the first time, in that the covers of the books could be manufactured independently of and at the same time as the sewing of the textblocks, to be united, by adhesive only, at the final stage of the binding process," was very popular in Germany as early as 1725 and is the best example of the 19th Century industrialization of the binding trade (1994, p. 91). The flat-back case binding, by cutting out steps that became costly and burdensome with the rise in printed matter, was an important step in moving toward mechanization of library bindings, as well as a discovery of a reliable form of hand binding.
References
Greenfield, J. (1998). ABC of bookbinding: a unique glossary with over 700 illustrations for collectors & librarians. New Castle, Delaware: Oak Knoll Press; New York, NY: Lyons Press.
Pickwoad, N. (1994). Onward and downward: How binders coped with the printing press before 1800. In R. Myers & M. Harris (Eds.), A Millennium of the Book: Production, design, & illustration in manuscript & print, 900-1900. Winchester, U.K.: St. Paul's Bibliographies; New Castle, Delaware: Oak Knoll Press.
Roberts, M., & Etherington, D. (1982). Bookbinding and the conservation of books : a dictionary of descriptive terminology. Washington, D.C.: Library of Congress.
Young, L. (1995). Bookbinding & conservation by hand: a working guide. New Castle, Delaware: Oak Knoll Press.
Thursday, May 21, 2015
Coptic Bookbinding
The idea of a book serving as a companion -- a humane presence in whose company one takes nourishment, a trustworthy guide on pilgrimage or expendition, a close associate whose society one prizes -- dates back to the classical world.
-- The Oxford Companion to the Book, 2010, p. xi
Over the course of the month of April I took the Bookbinding Core Certificate Program at the San Francisco Center for the Book. During the first weekend class, on Saturday April 4, we executed a Coptic stitched book. The program increased in complexity each consecutive week, so this first week was an introduction to the tools, vocabulary, and materials in addition to being an introduction to one of the oldest methods of binding, coptic bookbinding.
Although some Coptic bound codices from Ancient Egypt were made from wooden boards covered in leather and sometimes had a wrapper attached to the spine (Roberts and Etherington, 1982, p. 65), the book we made has an exposed spine and covers composed of contemporary (paper) bookboard that are covered with paper. The exposed spine of the product of this workshop is great for showing off the chain stitch, that typical Coptic braid. Additionally, a signature touch of the Coptic binding style was the inclusion of headbands that extend to the boards (Greenfield, 1998, p. 81), but since this workshop started with the basics, we did not include headbands or tailbands.
For this workshop we were supplied with pre-cut pages to make the signatures, as well as bookboards that had roughly been cut to size. We choose and cut paper for the covers ourselves, as well as trimmed the fore-edge of the signatures once we folded them and trimmed the bookboards. We learned how to use the large paper cutter this week! The sewing of the actual coptic stitch through the sewing stations in the signatures was fun, except for the complicated punctures that were required through the book boards (four punctures with a thin awl, two being diagonal coming through the spine to either of the closest front and back holes). I think this was especially difficult because I did not have a thimble or needle gripping tool, and because I was using the same hooked needles that make the looping of the coptic stitched braid easy (it's hard to poke a curved needle through a diagonal burrow in the spine of the cover!). Out of all the bindings I learned in this program, this is the only one that does not use all along stitching -- we used two pieces of thread and four sewing stations.
![]() |
| Hook needle on one end of a piece of still-attached thread. Yes that's my blood on the cover! (Happy Easter) |
![]() |
| Workstation towards the very end of the workshop. Threads just waiting to be tied off. |
![]() |
| Finished view of the spine. That crooked stitch on the right could use some improvement! |
To discuss the Coptic method of stitching or binding is to dive into the history of writing and the genesis of what can be defined as a book. Historically, as humans developed methods of organizing data that their minds alone could not hold, they used scripts on tablets made of stone or clay, then they used scrolls often made from papyrus or parchment, and finally leaves often made of papyrus that needed to be bound together to maintain order and portability, which brings us to the period of the codex. We have evidence of the existence of codices as early as the 1st Century A.D. (Roberts and Etherington, 1982, p. 60). The Oxford English Dictionary defines codex as, "A manuscript volume: e.g. one of the ancient manuscripts of the Scriptures (as the Codex Sinaiticus, Alexandrinus, Vaticanus, etc.), or of the ancient classics" (OED Online). At this contemporary point in history, codex refers to the most ancient form of what we now consider a bound book, but within the book worker culture, codex can be a broader term that takes on connotations of artistry, handy work, and a specific subculture (see the Codex Symposium and Book Fair).
As with many things, religion was the catalyst for the development of codices and the Coptic method of stitching, as "Copts are native Egyptian Christians [whose] bindings are the earliest known bindings of the codex format" (Greenfield, 1998, p. 81). The discovery of the Nag Hammadi Codices in Egypt in 1945 was a special insight to evidence of this method of binding, not to mention a discovery that provided primary sources of the Gnostics. While later development of the codex showed a preference for vellum or parchment as materials, these early examples of of Coptic-stitched codices show the use of papyrus for leaves (Roberts and Etherington, 1982, p. 60) and leather for covers.
One of the neat things about the Coptic bound codex is how it contains most of the major trends in bookbinding in its compressed history. With its development we see the innovation of style, form, and materials that have become typical in later eras and regional trends of bookbinding.
References
Codex. (2015). In OED Online. Retrieved from http://0-www.oed.com.ignacio.usfca.edu/view/Entry/35593?redirectedFrom=codex
Greenfield, J. (1998). ABC of bookbinding: a unique glossary with over 700 illustrations for collectors & librarians. New Castle, Delaware: Oak Knoll Press; New York, NY: Lyons Press.
Roberts, M., & Etherington, D. (1982). Bookbinding and the conservation of books : a dictionary of descriptive terminology. Washington, D.C.: Library of Congress.
Suarez, M. F., & Woudhuysen, H. R. (2010). Introduction. In M. F. Suarez & H. R. Woudhuysen (Eds.), The Oxford companion to the book (ix - xiii). New York, NY: Oxford University Press.
Subscribe to:
Posts (Atom)